

How to Prevent Users from Resetting Windows 10 Devices with Applocker and MEM
Anyone who has been a Windows device admin for a school system that implements a student laptop program is aware of the constant battle to keep students in check when it comes to their devices. A common ploy by the students is to reset their devices to factory default to bypass enforced security policies. Even if students can’t get to system settings, they can always hold down the shift key while they use the mouse to select the Restart option from the Windows Start button. This gets them to the Advanced Startup screen where they can then reset the device. This of course starts the computer with a clean slate, giving students time to make local accounts on their device. It also gives them access to the command prompt screen and other things. For computers that are managed byGroup Policy, students that reset their devices off premise will enjoy a newfound freedom until the computer returns to campus and receives its assigned policies once again. What’s more, a PC tech may have to manually deploy a package file to install the required applications, consuming precious time from both the student and the technician. For those computers managed by an MDM provider, policies and applications will be deployed once the computer connects to the Internet, making any acquired freedom brief, but perhaps meaningful enough to be worth the effort to the student.
Even if you don’t work for a school system, you still might want to stop your users from resetting their devices. Fortunately, there is an easy way to do it using AppLocker to create a policy that can be deployed using Group Policy or your preferred MDM solution that will prevent standard users from implementing a factory reset.
Create an AppLocker Executable Rule
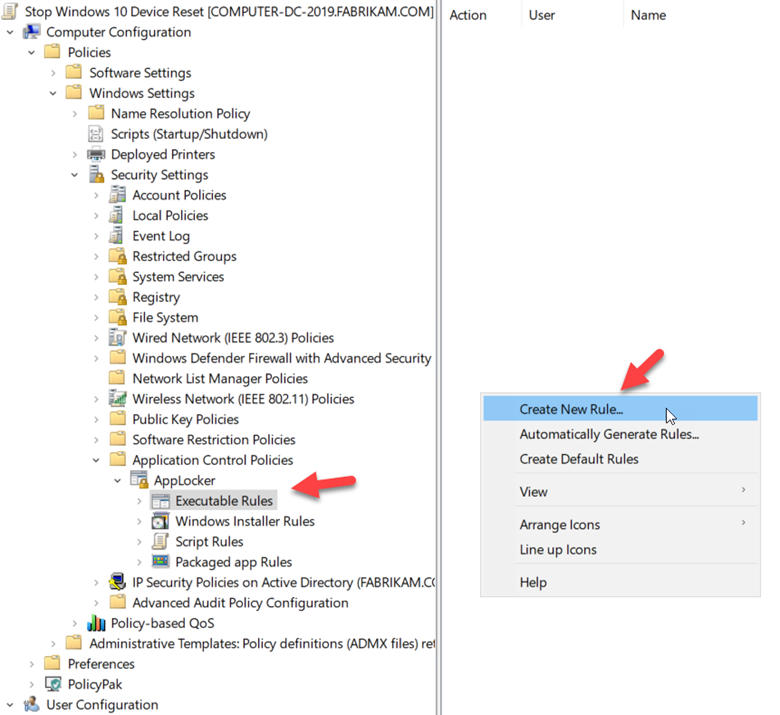
Using Windows Group Policy Management Editor, create a GPO and go to Computer Configuration > Security Settings > Application Control Policies > AppLocker > Executable Rules. Right-click and select Create New Rule as shown in the screenshot below.
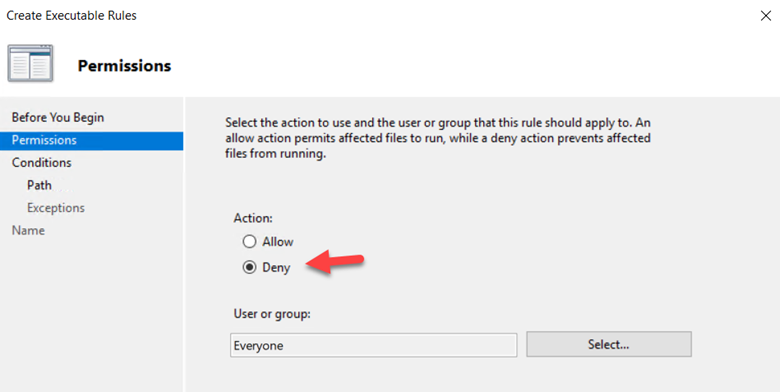
Using the wizard, choose Deny as the action. You can target a specific group or just go with the default Everyone group as shown below.
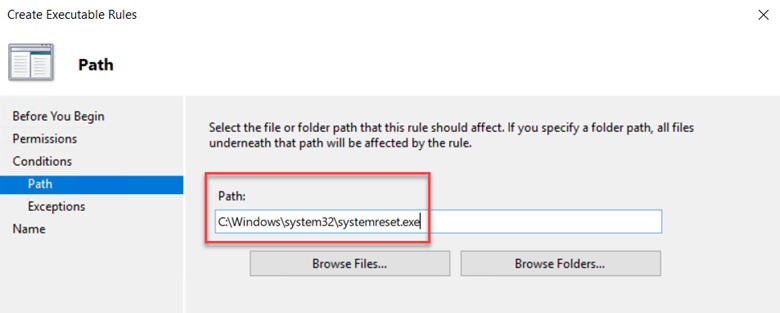
In the next screen choose “Path” as the primary condition. There are two path executables we need to block. Each will require their own rule. For this rule let’s choose:
C:\Windows\system32\systemreset.exe
as shown in the following screenshot.
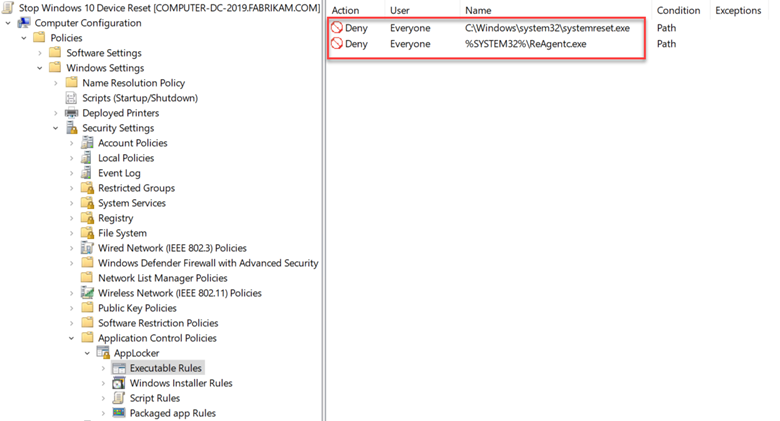
Continue with the Wizard. Name the rule and click Create. Now create another executable rule using the same process. This time we will use environmental variables for the file path which is %SYSTEM32\ReAgentc.exe. Now you will have two rules as shown below.
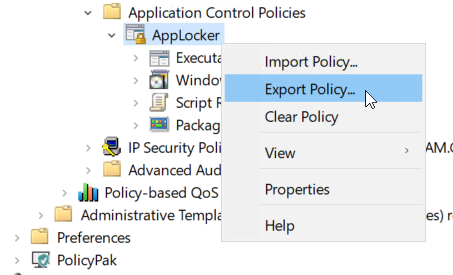
Now assign the GPO to the targeted computers. But what about Windows 10 devices that are managed by Microsoft Endpoint Manager or similar MDM provider? In that instance, you can export the AppLocker rules by right-clicking on AppLocker and exporting the policy as shown below.
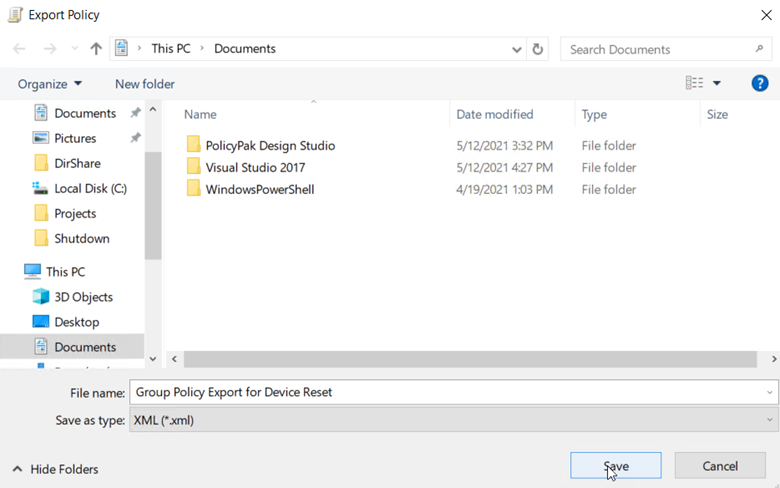
Name the policy and save it as an XML file.
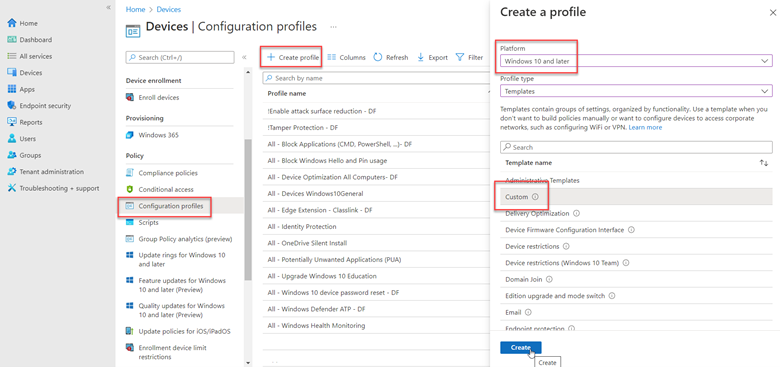
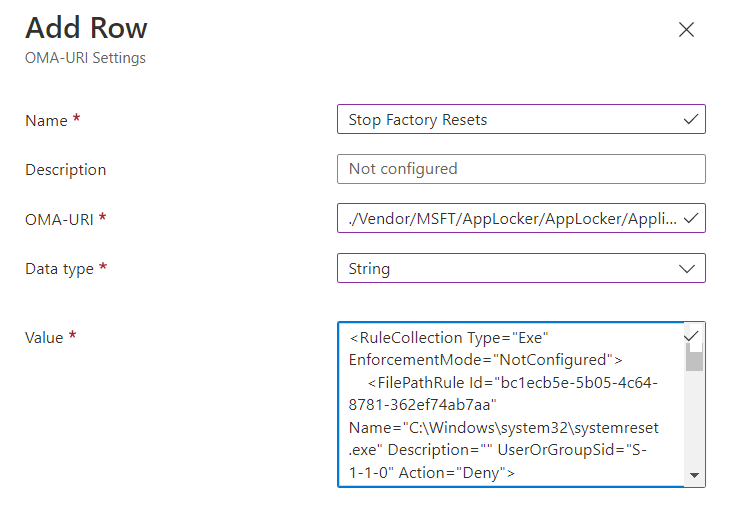
Now import that XML file into MEM by going to Devices > Configuration profiles > Create policy > Windows 10 and later > Templates and choose Custom and click the Create button.
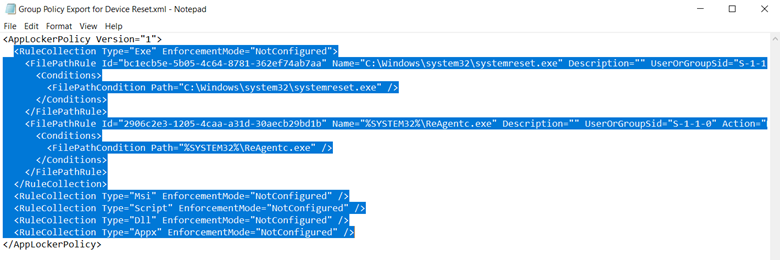
Now open the saved XML file with a text editor and highlight and copy all the content within the AppLocker tags as shown in the screenshot below.
Using the wizard, name the policy and go to configuration settings. Here you will need to add the OMA-URI settings. In the OMA-URI textbox you will input the following path:
/Vendor/MSFT/AppLocker/AppLocker/ApplicationLaunchRestrictions/apps/EXE/Policy
Choose String as the Data type and then paste the XML code you copied into the Value box as shown below. Then click next until you finish out the wizard and create the policy.
You will then assign the policy to your targeted users. The next time a student or user attempts a factory reset, they will receive a message informing them that the action is not allowed for their organization.

Comments (0)